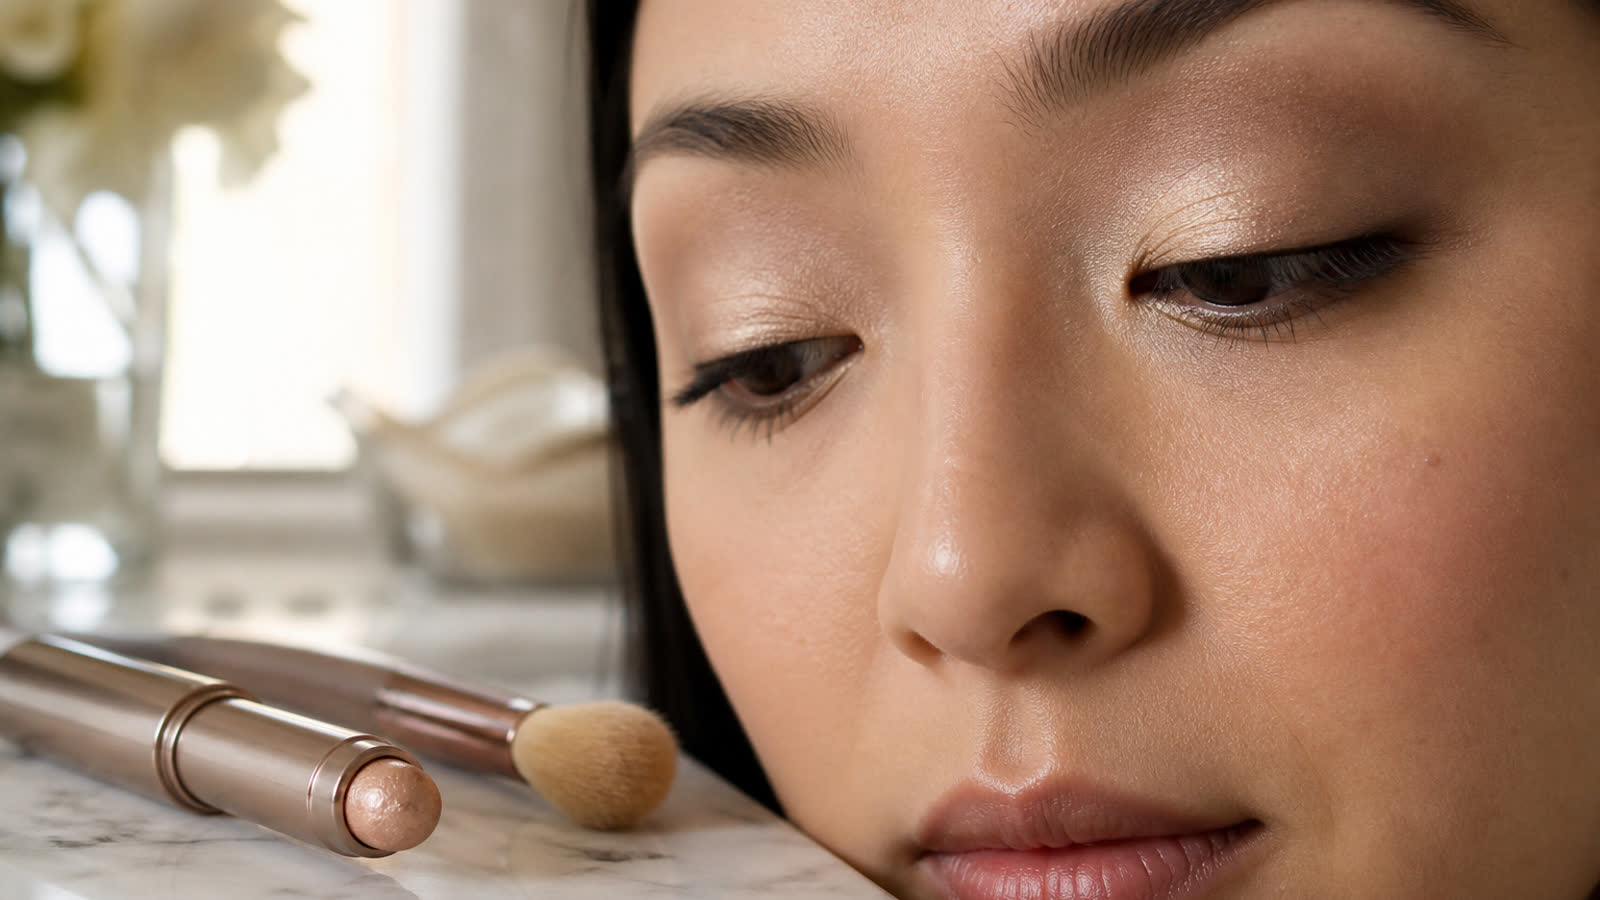
An eyeshadow stick looks like the easy answer for hooded eyes. One swipe, no palette, no seven-brush kit. Then you look up from the sink and two things have gone wrong at once: the color that was on the mobile lid is now a shiny stripe on the hood, and the color that stayed in the hidden crease is invisible when you look straight ahead.
That is the question Reddit and YouTube keep asking in plainer language: which cream crayons survive skin-on-skin blinking, and which ones just grease the fold. Search results still mix brand landing pages with generic “best cream shadows” lists that never mention a hood. This page stays on the stick format, on crease-resistant dry-down, and on color that remains visible with the eye open.
This is the stick-formula sibling. Placement maps stay on eyeshadow for hooded eyes and the open-eye application walkthrough. Blending motions stay on how to blend eyeshadow for hooded eyes. Cream versus powder as a category stays on cream vs powder vs liquid. Those URLs stay live. This URL is about crayons, twist-ups, and cream-to-powder sticks.
The Beauty Desk does not run an in-house lab or a test fleet. Picks below are mapped by formula behavior that shows up in manufacturer wear claims, published artist notes, and verified-buyer complaints about transfer on hooded lids. For sourcing and affiliate disclosure, see the editorial policy and how we make money.
Two Failures, One Stick
A hooded eye has a flap of skin that rests on the mobile lid when the eye is open. Every blink is a wipe. Powder can fail here too, but a stick fails in a more specific pair of ways.
It creases. Heat and friction in the fold soften waxes. Product that is still creamy gets squeezed into a line, then stamped upward onto the hood. That is the “my crayon melted into my crease” complaint.
It disappears. Color that lands in the hidden crease is doing work you cannot see. A stick that “looks perfect” with the chin down is often parked exactly where the hood will cover it. Crease-resistant is useless if the payoff is on the wrong square centimeter of skin.
Those are different problems. A fast-setting matte can lock and still vanish if you drew it inside the fold. A luminous wash can stay put and still read as a greasy bulge if you parked shimmer on the hood skin. The rest of this page treats both.
Heat and friction. The fold is warmer than the center of the lid. Waxes that stay soft will melt into the crease line and stamp upward.
Set time. Sticks that advertise “playtime” need that playtime with the eye open, then they need to lock. If you keep blending after the film has started to skin over, you roll product into the fold on purpose.
Finish. Shimmer reflects. On a visible lid sliver it opens the eye. On the hood it reads as a wet patch. Matte or satin above the fold is the safer depth.
Load. A chubby stick dumps more product than a thin twist-up. Extra cream in a small visible lid is extra cream for the hood to steal.
If your shadow is sliding for oil reasons that have nothing to do with the crayon format, the crease guide and oily-lid primer sequence still apply. A stick does not cancel oil. It only changes how oil shows up.
The Sixty-Second Stick Diagnostic
Before you buy a third crayon because the second one “didn’t work on hooded eyes,” run the stick you already own through this. It is not a lab test. It is the same check artist notes and buyer threads keep repeating.
Hand swatch, one minute. Draw a short stripe on the back of your hand. Blend the edge once. Wait sixty seconds. Press a clean fingertip onto the stripe, then look at the finger. A crease-resistant candidate leaves little or no wet transfer. A fold-printer still looks shiny and comes off in a smear.
Lid sliver, eyes open. Sit at a mirror. Look straight ahead. The only skin that counts for a lid wash is the strip you can still see above the lashes. If that strip is two millimeters, your stick job is a thin bar, not a full-lid paint.
Fold paper test, analog. After the stick has set on the lid, blink slowly ten times and look at the hood skin. A faint veil you can powder is normal on day one of a new crayon. A crisp stamped stripe means you blended too late, loaded too much, or the formula never dried.
The “I keep touching it” fail. If you cannot leave the edge alone, you need a cream-to-powder stick, not a longer-play cream. Playtime is a feature on an open crease. On a hood it is a countdown.
Do this on a weekday morning, not after a hot shower. Steam and leftover moisturizer fake a “bad formula” result.
Formula Traits That Matter More Than Brand Names
Read the barrel the way you would read a primer label. The name on the cap is marketing. The dry-down is the product.
Cream-to-powder dry-down. These start slippery and finish like a thin pressed shadow. They are the most forgiving on a hood if you blend in the first half-minute. Julep Eyeshadow 101 (~$14–20 depending on listing) is the drugstore version of this behavior: swipe, blend, then stop. Waterproof copy on Julep is a set-time claim. It is not permission to skip the open-eye check.
Longwear cream that skins over. These stay creamier in the bullet but form a flexible film. Laura Mercier Caviar Stick Eye Shadow (~$32) is the usual reference. Manufacturer copy claims waterproof, crease-resistant wear after you blend. On a hood, that only happens if you do not keep touching it. Caviar is the stick people mean when they say “the good crayon.” It is also the stick people over-blend because it feels expensive and blendable.
Chubby luminous crayons. NUDESTIX Magnetic Luminous Eye Color (~$28) is built for a one-and-done wash. The larger diameter is easy to place on a small visible lid, and easy to overload. Use the side of the bullet, not a jab into the fold. This is a visibility tool — one pass of light on the sliver you can still see — not a crease tool.
Emollient “balm” sticks. If the swatch on your hand still looks wet after a minute, it will print. Save those for a lower-lash smoke you can afford to smudge, not for the hood contact zone. Balm sticks show up in “dewy lid” trends. Dew on a hood is a crease with lighting.
Ingredient tells, without a lab. Listings that lead with oils, butters, and “balmy” copy are slower to set. Listings that lead with film-formers and “cream-to-powder” or “waterproof stick” copy are usually faster. Neither group is automatically better for sensitive lids; if the eye area reacts, the sensitive-eye ingredient notes still apply. This page is about transfer and visibility, not a patch-test substitute.
Beauty Desk listing check: Confirm the listing is a shadow stick or eye crayon, not a matching eyeliner pencil or a pressed-powder single in a stick-shaped compact. Shade names move between shimmer and matte lines. Prefer new, sealed stock over marketplace “used once” lots. A dried-out bullet will drag on a hood and tug the fold. A melted bullet will dump oil into it.
How to Read “12-Hour” and “Crease-Proof” on a Listing
Hooded-lid threads treat those words as a dare. The desk treats them as a category label.
Waterproof / longwear on a stick usually means the film resists water and some oil after it sets. It does not mean the film resists a wipe while it is still wet. Blend first. Then the claim can start.
Crease-resistant on a standard-lid model means the product does not gather in an open crease from heat alone. A hood adds mechanical wipe. If buyer photos show a clean lid on non-hooded eyes and a stamped hood on hooded eyes, believe both photos. The formula did not change. The anatomy did.
“No primer needed” is a dry-lid claim. Most hoods are not dry lids. Skip primer only after a weekday wear where the stick stayed put and stayed visible. If you crease at two hours, add a thin primer before you buy a more expensive crayon.
Shade-name theater. The same family will sell a matte taupe and a frost champagne under names that sound interchangeable. The finish is the job. If the barrel photo looks wet or foiled, it is a lid-wash candidate, not a faux-crease candidate.
Gym, humidity, and mask wear belong on the waterproof eyeshadow page for formula class. This page only cares that a waterproof stick still has to set before the hood lands on it. A locked film can handle sweat better than a balm. It cannot handle being applied into the hidden crease.
How to Apply a Stick on a Hood (The Part Palettes Skip)
This is timing and a visible-lid swipe, not a new placement encyclopedia. If you need the powder map, leave this page and use the hooded application guide.
-
Blot, then prime thin. If the lid is shiny, blot first. A rice-grain of e.l.f. Shadow Lock Eyelid Primer (
$8) or Urban Decay Primer Potion ($26) goes on with a synthetic shader, not a thick finger layer. Wait until it looks dry, not glossy. Too Faced Shadow Insurance (~$24) is the slightly creamier option for drier mature hoods; still keep the film thin. -
Look straight into a mirror. The visible lid is your canvas. The hidden crease is not.
-
Swipe the lid shade on the skin you can still see. Start above the lash line and stop before the hood shadow. Two short strokes beat one heavy drag. If you cannot see the stroke with your chin level, you drew it in the trash zone.
-
Blend immediately with a small fluffy brush or a clean fingertip, working the upper edge up and out so it sits just above the fold. This is the same open-eye logic as the application guide, just with a crayon instead of a pan.
-
Stop. Set a thirty-second timer if you have to. After that, extra blending is transfer.
-
Optional lock. If the fold still picks up shine, press a matching matte powder on the upper edge only with a small pencil brush. Do not sweep a big blender through a half-set cream. That is how you get a muddy band.
-
Liner after the stick has set. Felt-tip or pencil on top of a locked cream holds. Drawing liner into wet cream just moves the cream.
A six-minute weekday version: primer, one satin stick on the visible lid, one deeper matte stick dashed above the fold and blended once, mascara. That is not a replacement for the everyday look menu. It is the stick version of a two-shade hooded map.
Shade Jobs: Two Sticks Beat Five Pans
Hooded lids do not have room for a four-zone gradient that lives entirely on the mobile lid. Give each stick a job. The job is how color stays visible.
Lid wash (satin or fine shimmer). Champagne, peach-bronze, soft taupe, or a muted rose — whatever is one or two steps from your skin. This is the only place a reflective stick earns its keep. Keep particles fine. Chunky glitter on a hooded lid is fallout plus fold glitter. If you want sparkle, use the no-fallout glitter method on the center lid only, after the stick has set.
Faux crease (matte). One or two shades deeper than skin. Place it where you can still see it with eyes open, then blend the top edge toward the brow tail. This is the stick stand-in for the powder crease on the placement tips page. If this matte is not visible in the mirror with your chin level, raise it. Do not press harder into the hidden crease.
Lash-line density (matte or satin). The same deeper stick, or a darker crayon, dashed through the upper lashes and smudged with a pencil brush. This replaces a thick liquid wing that disappears into the hood. Density at the roots is visible even when the lid sliver is tiny.
You do not need a black crayon on the waterline. Black on the lower rim shrinks the opening, which hooded eyes usually cannot spare. A brown tightline on the upper lashes is enough.
Fair, medium, and deep lids use the same jobs. Fair lids usually want a soft taupe or mauve matte above the fold so the depth does not read as a bruise. Medium lids can take a cocoa or warm brown matte without losing the wash. Deep lids need a matte that is actually deep — a “universal taupe” stick will vanish on melanin the same way a hidden-crease swipe vanishes on a hood. The desk is not assigning shade SKUs you have to buy. The rule is contrast you can still see, not a brand’s “nude” name.
Picks by Job, Not a Fake Podium
These are not “we wore them for 400 hours” rankings. They are the stick types that match the jobs above, using listings the desk already tracks. If a mill listicle told you there is a single best crayon for every hood, that listicle did not look at set time or at a closed lid.
Fast cream-to-powder for people who over-blend
Julep Eyeshadow 101 (~$14–20) is the stick you buy when you know you will fuss. It starts creamy enough to move the edge above the fold, then it behaves like a powder. That dry-down is the point on a hood. Choose a satin or matte for the faux crease. Save the frostier metallics for the visible lid sliver, not the hood skin.
Who it is for. Beginners who keep blending. Oily hoods that need a film that turns powdery. Anyone who wants a second stick in a second finish without a prestige price.
Who should skip it. If you want a wet metallic wash and you refuse powder, this is the wrong texture. If your lid is very dry and the bullet drags, warm it on the back of your hand first or pick a creamier longwear stick.
Beauty Desk listing check: Julep listings mix single sticks and sets. Confirm the shade name and finish (matte vs shimmer) on the barrel photo. Waterproof copy does not mean you can skip blending before it locks. Confirm you are not buying a lip crayon in a similar tube.
Blend-then-lock cream for a cleaner wash
Laura Mercier Caviar Stick Eye Shadow (~$32) is the mid-range stick people mean when they say “the good crayon.” The formula has enough slip to even out a small lid, then it skins over. On hooded eyes, treat the playtime as a countdown. Swipe, lift the edge above the fold, leave it.
Matte Caviar shades do the faux-crease job. Shimmer Caviar shades do the lid-wash job. Do not use one shimmer stick for both. That is how the hood starts glittering.
Who it is for. Small visible lids that look patchy with a dry powder. People who will actually stop blending. A one-stick satin wash when you do not need a dramatic crease.
Who should skip it. If you cannot stop diffusing the edge, you will roll a $32 film into the fold and blame the brand. Use Julep’s faster dry-down, or set the Caviar edge with powder and walk away.
Beauty Desk listing check: Shade names jump between shimmer and matte lines (Au Naturel, Sandglow, and current equivalents). Confirm you are buying the stick, not a Caviar-adjacent powder compact. Marketplace lots of “almost new” crayons are often dried or heat-damaged. A crumbly Caviar bullet is not the formula in the reviews.
Chubby wash when brushes feel like too much
NUDESTIX Magnetic Luminous Eye Color (~$28) covers a small visible lid in one pass. Use less than you think. Draw a thin bar on the center lid, then tap the edge up. If you drag the full bullet from inner corner to hood, you will deposit a ridge exactly where the fold lands.
This is a wash tool, not a crease tool. Pair it with a separate matte stick or a powder transition if you need depth. The luminous finish is how a tiny lid sliver stays visible in office light. It is also how a hood looks shiny if you treat the bulge as more lid.
Who it is for. One-and-done weekday color. People who hate a shader brush. Inner-corner or center-lid light after a matte stick has set.
Who should skip it. Full hoods with almost no mobile lid should not frost the hood skin with this. Oily lids that already stamp cream should set the edge or pick a drier cream-to-powder.
Drugstore crayons people already own
Maybelline Color Tattoo Eye Stix and e.l.f. No Budge shadow sticks show up constantly in hooded-eye threads because they are cheap and twist-up. The desk does not invent a wear-hour number for them, and it does not invent an ASIN that is not already tracked on this site. The useful filter is the same: if a swatch on the back of your hand looks dry at one minute, it is a candidate for the lid. If it still looks wet, keep it off the fold or set it with powder immediately.
If you already use NYX Jumbo Eye Pencil in Milk (~$5) as a brightening base, keep it on the inner lid only and set it. A white jumbo on the entire hooded lid can crease into a chalk line. Milk is a spotlight, not a hood-wide primer.
Primer that does not fight the stick
Primer is optional only when the stick is truly cream-to-powder and the lid is dry. Most hooded lids are not dry. e.l.f. Shadow Lock is the thin drugstore layer. Urban Decay Primer Potion is the drier silicone barrier. Wear-time rankings for oily lids live on best primer for oily lids and the broader oily-lid primer list. This page only cares that the primer is dry before the crayon moves.
A wet primer plus a wet stick is two slip layers. That stack is how “I primed and it still creased” posts get written. The primer failed by being too generous, not by existing.
What Fails on a Hood (Even If the Stick Is Expensive)
- Eyes-closed application. You cannot see the fold. The stick will land in the hidden crease and transfer the moment you open your eyes. The look can be crease-resistant and still invisible.
- Shimmer on the hood skin. Light hits the bulge. The eye looks swollen, not lifted.
- A single slow crayon for lid and crease. The crease needs a drier matte. The lid can take satin.
- Layering a second cream stick over a first that has not set. You get a paste. Paste prints.
- Big fluffy blending through wet cream. You push color into the fold. Use a smaller brush, the same advice as hooded blending.
- Skipping removal at night. Cream films left in the fold irritate faster than powder. Use the safe removal sequence.
- Buying a new stick because the old one was applied into the trash zone. If the color was never on visible skin, the formula never got a fair test.
If the look goes muddy, stop adding crayon. A clean brush and a little concealer on a flat synthetic will save more lids than a third stick. That rescue path is on fix eyeshadow mistakes.
Midday Transfer: Rescue Without a Third Stick
Hooded-lid forums jump to “this crayon is trash” at 2 p.m. Most of the time the film is fine and the fold has a stamp.
Do not add more cream. A second swipe on a stamped fold is more oil for the next blink.
Blot the hood, not the lid. A clean tissue or blotting paper on the upper skin lifts the stamp. Rubbing the mobile lid smears the wash you still want.
Press powder on the edge only. A tiny amount of matching matte on a pencil brush, patted, not swept. If you do not have matching powder, a skin-tone matte or a leftover transition shade is enough to kill shine.
If the wash itself slid. That is oil or leftover moisturizer, not a branding problem. Blot, resist the urge to redraw, and fix the base tomorrow. All-day wear tactics that are not stick-specific live on how to make eyeshadow last.
If you wear glasses. Frames wipe the hood the way a blink does, just on a schedule. Set the upper edge harder and keep shimmer off the part of the hood the pad touches. Lens-and-frame visibility notes stay on eyeshadow for glasses. This page only cares that a stick plus a frame is two wipe sources.
Partial Hood, Full Hood, Aging Hood
Partial hood. You still have a sliver of mobile lid. A satin stick on that sliver plus a matte stick just above the fold is enough. You can get away with a touch of inner-corner shimmer. This is where a chubby luminous crayon earns its price: one pass, visible immediately.
Full hood. Almost no mobile lid shows when you look ahead. Put the “lid” satin on the visible skin above the lash line — sometimes that is only a few millimeters — and put all depth above the fold. A stick is actually helpful here because you can draw a thin bar without a shader dumping powder into the lashes. Powder tutorials that assume a lid to blend on will waste your time. The stick’s job is a visible lash-line wash plus a raised matte.
Aging hood. The fold is often drier and more mobile. Avoid tugging. A creamy stick that does not drag is kinder than a dry pan, which is why sticks show up in the mature-eyes formula notes. Still set the fold. Texture plus unset cream is a crease magnet. Technique for aging lids stays on that page and on eyeshadow for mature eyes. This page does not replace them.
Oily hood. Treat the stick as the color layer, not the oil control. Blot, thin primer, wait, then swipe. If the crayon slides at two hours, the stick is not the villain. The oil is.
Monolid versus hood. A monolid may have little or no crease; a hood has a fold that rests on the lid. Some people have both. Stick timing is the same — set before skin hits skin — but the visibility map is not. Monolid placement stays on monolid eye makeup. Do not borrow a hooded “raise the crease” stick dash onto a monolid and call it the same problem.
A Two-Stick Map You Can Repeat
This is one map, not a lookbook.
- Prime and wait.
- Satin stick on the visible lid only. Blend the top edge once.
- Matte stick dashed along the open-eye fold line, from the outer third inward. Blend up, not down.
- Same matte stick through the upper lash roots. Smudge with a pencil brush.
- Wait thirty seconds. If the hood picks up color, press powder on that edge only.
- Mascara. Skip a heavy lower-lash smoke unless you want the eye to read smaller.
That map works with Julep plus Julep, Caviar plus Caviar, or a drugstore satin plus a drugstore matte. The brands are interchangeable. The jobs are not.
If the same lid has to last into dinner, add powder depth from the day-to-night conversion after the stick has set. Do not stack a smokey powder look on wet cream. A beginner smokey method on top of unset crayon is how you get a bruise-colored fold.
A Small Kit That Matches the Fold
| Job | Format | Why it survives a hood |
|---|---|---|
| Visible lid | Satin or fine-shimmer stick | Reflects on the sliver you can still see |
| Faux crease | Matte stick or matte powder | Depth without a greasy highlight on the bulge |
| Lash line | Same matte stick or a brown pencil | Density without a wing the hood hides |
| Base | Thin mattifying primer | Cuts the wipe without adding slip |
| Edge lock | Matching powder, small brush | Stops the stamp after dry-down |
A Real Techniques Everyday Eye Essentials set (~$10) is enough brush support: one small blender for the upper edge, one pencil brush for the lash line. You do not need a full palette to make a stick look finished. You need an edge.
If you already own a powder wardrobe, the stick does not replace it. Use the crayon for the visible wash and the single-shadow wardrobe for the raised matte if you prefer powder depth. Hybrid is allowed. Wet-on-wet cream stacks are not.
When Powder Still Wins
A stick is the wrong tool when you need a carved cut crease, a photo-sharp halo, or a look that will be blended for several minutes under lights. Those jobs want powder and time. They live on the cut crease and photography pages.
A stick is also the wrong tool when the lid is so oily that every cream turns to slip, even with primer. Fix the base first. The primer siblings exist because the crayon cannot do that job.
And a stick is the wrong tool when you wanted a one-shadow powder wash and bought a balm crayon because the display said “easy.” Easy on a hood is fast dry-down plus an open-eye swipe, not a product that stays wet enough to “play.”
What This Page Is Not
It is not a new hooded-eye placement tutorial. It is not a blending-motion lesson. It is not a cream-versus-powder encyclopedia. Those pages already exist.
It is the missing product-and-timing page for people who bought a crayon because they have five minutes and a fold that eats powder — then watched the crayon stamp onto the hood, or disappear into the crease they cannot see. The searcher who typed “best eyeshadow sticks for hooded eyes” wanted crease-resistant dry-down, finish, and an open-eye swipe that stays visible, not another generic cream-shadow list.
Once the stick stays put and stays visible, go back to the look you actually wanted: a one-shadow wash, a beginner smokey method, or a night-out lid. The hood stays. The formula has to keep up.
Notes on this page are informational. The Beauty Desk reviews published methods and listing details independently. We do not run a test fleet. See the editorial policy and how we make money.
Get weekly eye care & beauty tips
Guides from the Eyeshadow Looks Beauty Desk. No spam, ever.
Frequently Asked Questions
Do eyeshadow sticks work on hooded eyes?
Yes, if the formula sets to a dry film before the hood rubs the lid. Fast cream-to-powder sticks and longwear crayons survive the fold. Slow, emollient crayons that stay tacky will print a stripe onto the hood every time you blink. Color also has to land on skin you can still see with eyes open, or the stick 'works' in the crease and disappears in the mirror.
Should I use primer under an eyeshadow stick on hooded lids?
Use a thin, mattifying eye primer if your lids get shiny or if the stick stays creamy after a minute. Skip a thick, wet primer. Extra slip under a cream stick is how color migrates into the fold. Let primer dry about thirty seconds before the first swipe.
Where do you put an eyeshadow stick if you have hooded eyes?
Swipe the lid color on the skin you can still see when you look straight ahead. Place any deeper matte just above the hood fold, not inside the hidden crease. Check placement with eyes open. Color that looks perfect looking down is the color the hood will eat.
Are shimmer eyeshadow sticks bad for hooded eyes?
Shimmer is fine on the visible mobile lid and the inner corner. It is a problem on the hood itself and in the fold, where it catches light and reads as a greasy crease. Keep mattes for the faux crease and any skin that rubs.
Why does my shadow stick transfer onto the skin above my crease?
The hood is a second lid that wipes the first. If the stick has not set, that wipe becomes a stamp. Blend within the first twenty to forty seconds, then leave it. Setting the fold with a matching powder or a clean finger press after dry-down stops most transfer.
What does crease-resistant actually mean on a hooded lid?
On a listing it usually means the film resists oil and heat on a standard lid. On a hood it also has to resist a wipe. A stick can be '12-hour' on an open crease and still stamp in twenty minutes if you blend it after it skins over or park shimmer in the fold. Treat crease-resistant as a set-time claim, not a promise that placement no longer matters.
Related Articles
 tutorials
 How to Apply Eyeshadow for Hooded Eyes: Step-by-Step for Every Look
Read Guide arrow_right_alt tutorials
 Eyeshadow for Hooded Eyes: Placement Tips That Actually Work
Read Guide arrow_right_alt tutorials
 How to Blend Eyeshadow for Hooded Eyes: The Techniques That Actually Work
Read Guide arrow_right_alt tutorials
 Cream vs. Powder vs. Liquid Eyeshadow: Which Formula is Right for You?
Read Guide arrow_right_alt tutorials
 How to Stop Eyeshadow from Creasing: The Complete Guide
Read Guide arrow_right_alt tutorials